12 Pumpkin Carving Tips to Help You Create the Perfect Jack O' Lanterns for Halloween
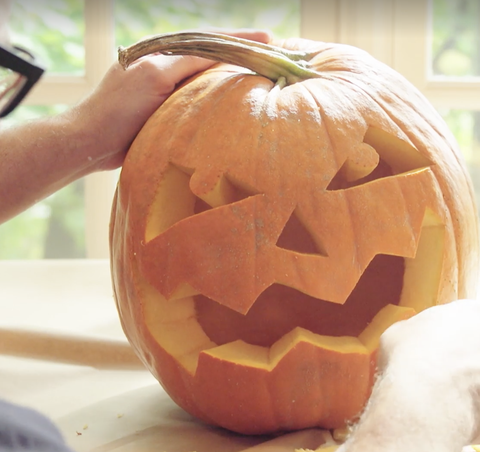
While spooky decor and classic costumes are the usual symbols of Halloween, you can't forget about the iconic jack-o'-lantern. Picking out pumpkins and deciding how to decorate them is one of the most enjoyable traditions of the Halloween season. That's why we're sharing our best pumpkin carving tips from the pros to help you and your family create your own All Hallows' Eve staple.
Carving a pumpkin is a lot harder than it looks — no matter how much of a beginner or skilled crafter you may be. So we gathered insight from experts to find out their go-to carving tips to bring your creepy creations to life — from the standard triangular eyes and toothy grin to a glittery masterpiece and carved-out black cat. And if you want to stray from the traditional route, check out these no-carve pumpkins and painted pumpkin ideas instead.
Step 1. Begin with the right pumpkin.
Choose one that's fresh, with a sturdy stem, no bruises and a flat bottom so it won't roll while you carve.
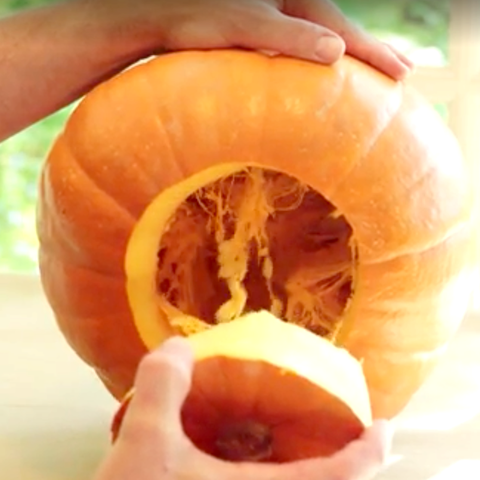
Step 2. Start cutting from the bottom, not the top.
Michael Natiello, pumpkin carving pro and creative director for The Great Jack-o'-Lantern Blaze, says cutting your "lid" from the bottom of the pumpkin helps prevent the sides from caving in later.
Step 3. If you do carve from the top, cut out the lid on an angle.
This way it won't drop inside the pumpkin when you put it back on top, like it would with a straight up-and-down cut. A boning knife should work well for this.
Step 4. Scoop out all the pulp (and then some).
You can buy a special "claw" for pumpkin gutting, but an ice cream scoop will do just fine. Thin the inner wall of the "face" area to 1¼-inch thick, so it will be easier to pierce the shell.
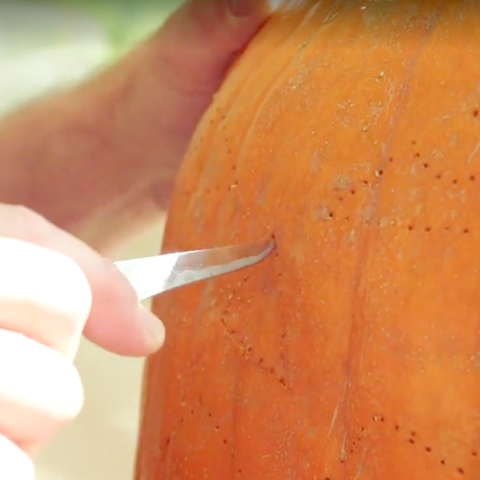
Step 5. Sketch out your design on paper first.
If you draw your jack-o'-lantern face to size, Natiello says you can use it as a pattern: Just tape it to the front of your pumpkin and use a fork or pencil to poke holes along the lines you want to carve. (Or save yourself from creative blocks by getting a pumpkin carving kit, complete with a marker, scraper, cutting tools and pre-made patterns.)
Step 6. Hold the pumpkin in your lap.
It's easier to create features when the face is gazing up at you. Natiello suggests using a serrated kitchen knife or an X-Acto knife for carving, but to make intricate designs, you could try using a small saw. Just don't cut on a slant — clean up-and-down slices look best.
Step 7. Start by making simple rough cuts.
If you get the big pieces of pumpkin out of the way first, you can go back and clean up the edges of your design later.
Step 8. Use your scraps creatively.
Make a tongue, pipe or hair accessories out of a discarded piece of pumpkin shell, for example.
Step 9. Keep your pumpkin fresh.
Natiello recommends spreading petroleum jelly on the cut edges to seal in moisture. If your pumpkin still shrivels a few days later, you can revive it with a facedown soak in cold water for up to eight hours.
Step 10. Light it up.
Place your candle (or candles) into your pumpkin before lighting. If you don't want to use votives, try Christmas lights, especially those that blink for a spooky appearance. Or, save yourself the stress and go with battery-operated votives instead.
Step 11. Create a chimney.
First, leave the lid on for a few minutes while the candle burns. Then make a small hole where the lid has blackened.
Step 12. Sprinkle cinnamon inside the lid.
That way, when you light the candle, your jack-o'-lantern will smell like a pumpkin pie. Yum.
0 comments


